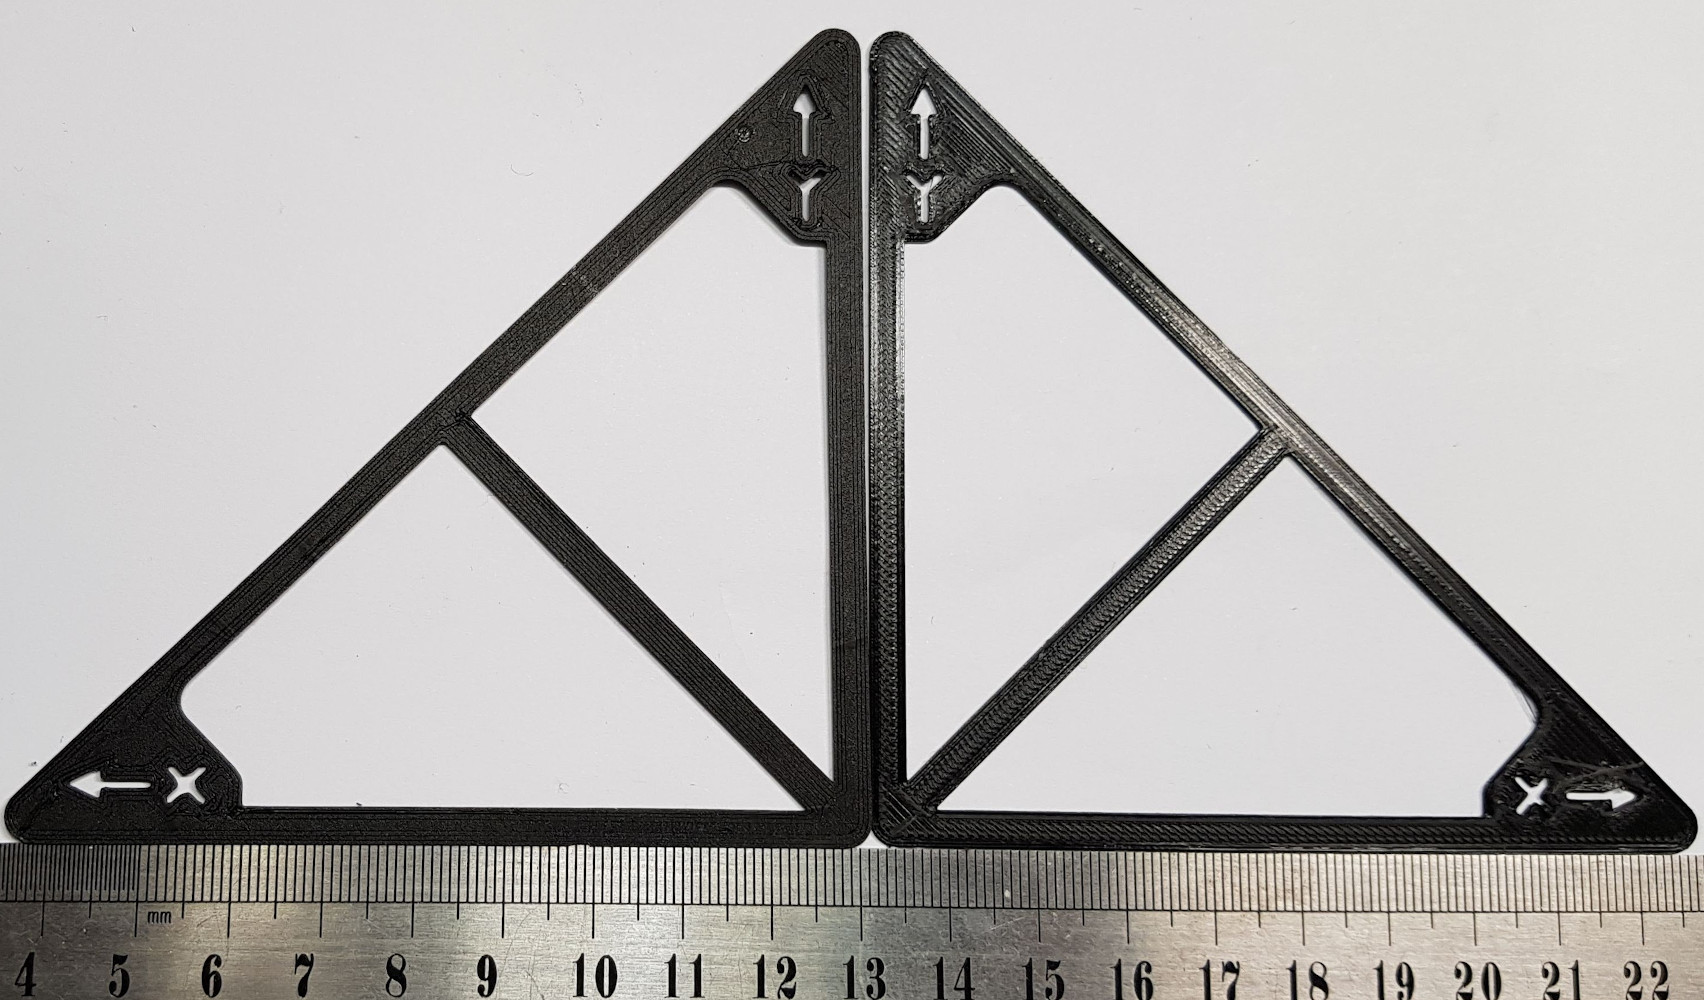
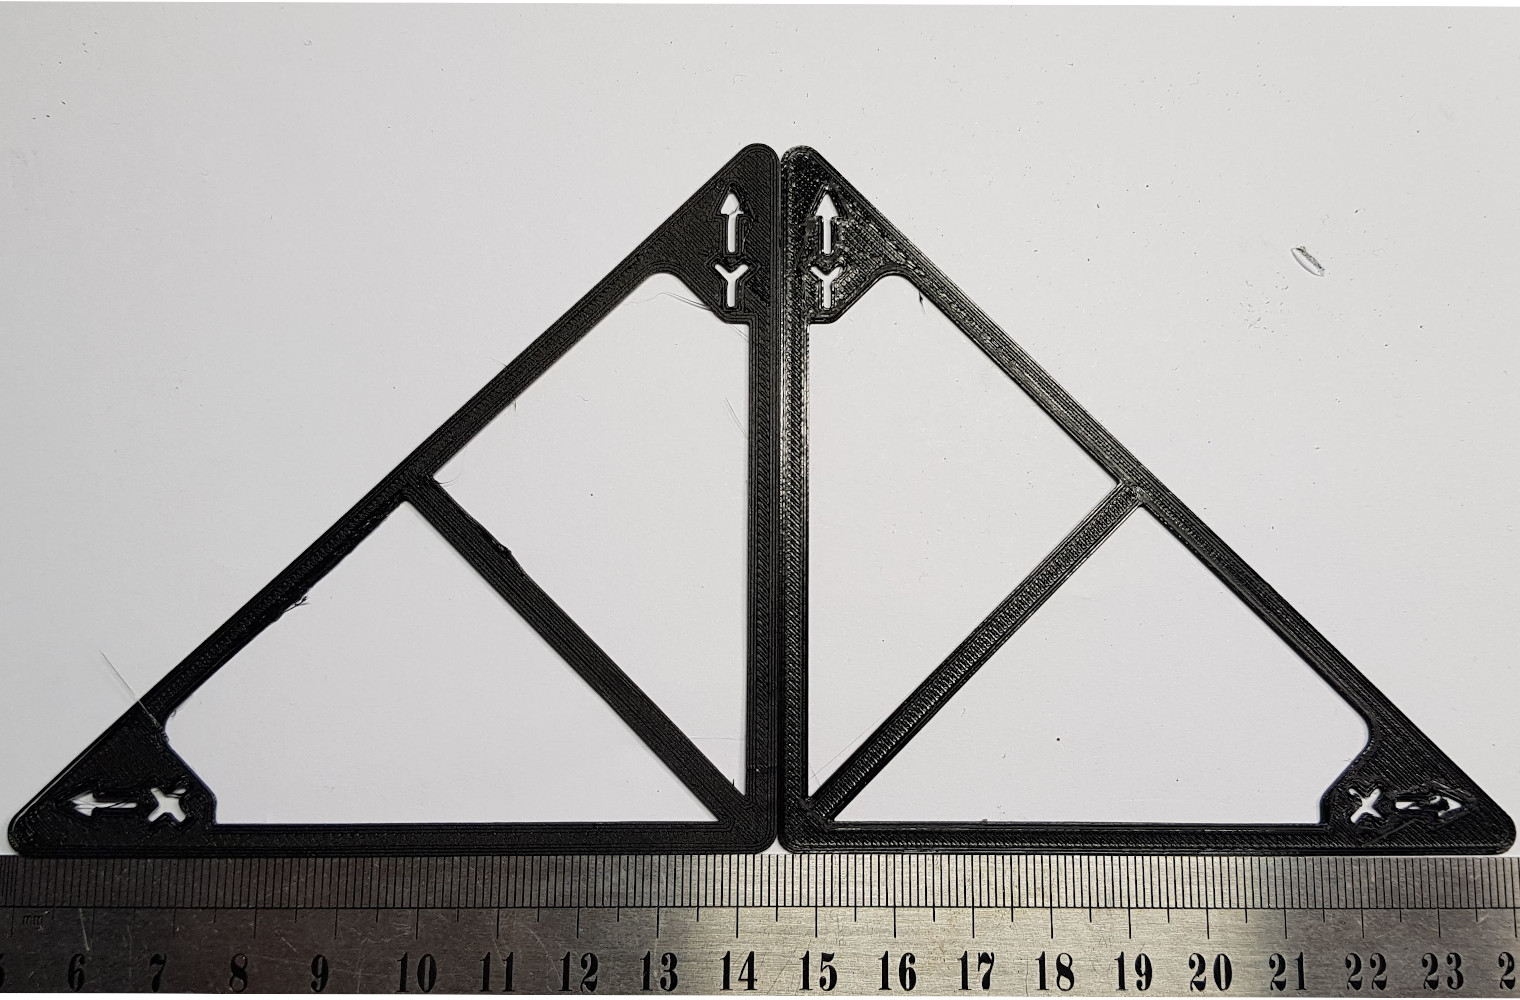
2. When printing is complete, place the pieces back to back against something you know is straight (such as a steel scale) by turning one upside down, when you do this the angular error is doubled making it very easy to see if the printer is good or badly adjusted. In my case, the error was about 0.3 ° (which at 200mm gives a lateral offset of about (1mm).
3. to adjust the angle you release the attachment between the arc of the x / z axis and the y axis, I my case was it enough to loosen the screws on one side (it depends a bit on the printer design) and move it and bit back. Use a caliper to keep track of how much you are moving, it will then be much easier to estimate how much more (or less) you need to move the attachment if you not satisfied with the result the first time.
If like me dont have a bracket properly positioned to measure against you can for example put a piece of tape, take a screw and a T- nut and screw in the screw until it locks into the bottom of the aluminum profile groove or print a normal angle braket to a 2020- profile in order to obtain a solid and good reference point.